New ASTM E2737 Detector Evaluation Package Offers Automated Analysis of Image Data
Share:
Press Release Summary:

- Available with pre-calibrated artefact and simple-to-install customised bracketry with fast-change adapters
- Long-term performance and stability of the detector can be tracked throughout its service life
- Suitable for X-ray CT inspection, metrology and large envelope CT systems
Original Press Release:
Automatic Evaluation of X-ray Detector Performance
Nikon Metrology's new Detector Evaluation Package in accordance with ASTM E2737 uniquely offers automated analysis of image data with performance trend analysis
Safety standards are becoming ever stricter throughout manufacturing, particularly in the aerospace and automotive industries. Companies using X-ray CT (computed tomography) for non-destructively testing safety-critical components in those and other sectors are increasingly being required to, or may simply wish to, make every effort to show the veracity of their inspection results.
The condition of the digital X-ray detector in particular has a considerable influence on the efficiency and accuracy with which features are revealed and measured, so being able to evaluate and track its performance over time is crucial. To help users of Nikon Metrology's X-ray CT systems to process check their detector performance throughout service, the company has launched a new monitoring kit that provides market-leading functionality and simplicity in accordance with the globally accepted standard, ASTM E2737.
The new ASTM E2737 Detector Evaluation Package is available to suit the entire range of Nikon Metrology’s X-ray CT inspection, metrology and large envelope CT systems. All of the manufacturer's X-ray sources are supported including rotating target technology and the world's only 450kV microfocus source, in addition to the full range of industry-leading detectors.
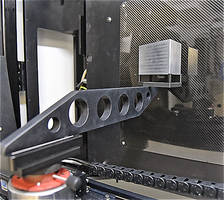
The package comes with a pre-calibrated artefact known as a 5-groove wedge phantom and easy-to-install, customised bracketry with quick-change adapters that allow the operator to secure the phantom in the right positions.
Dedicated software performs all necessary functions, including artefact manipulation, image collection and data analysis; creating a detailed report, automatically and rapidly. The streamlined workflow relieves the operator of manual intervention and deskills the procedure to the point where it can be carried out by an operator who knows little about ASTM E2737 or indeed X-ray CT.
Data is obtained on nine detector parameters: spatial resolution, contrast sensitivity, material thickness range, signal-to-noise ratio, signal level, image burn-in, image lag, offset value and bad pixel distribution.
The long-term performance and stability of the detector can be tracked throughout its service life and its consistency compared with a user-defined baseline and customisable thresholds and warnings. Results from all of the nine ASTM E2737 tests are stored every time a suite of measurements is made so they can be interrogated at any time. Graphical and tabular presentation of the results aids visualisation.
The automated workflow from image collection up to the creation of the final report as well the powerful trend analysis capabilities, make the Nikon Metrology ASTM E2737 unique.
Being able to track detector performance over time according to international standards and in an easy way, is of particular benefits to companies that rely on Computed Tomography to control the quality of their products and optimize their production processes as part of their Industry 4.0 initiatives.
Media Contact:
Nikon Metrology, Inc. – Americas
12701 Grand River Ave.,
Brighton, MI 48116, USA
Tel: 1 810-220-4360
Contact: Meghan Meinert, Assistant Marketing Manager
Email: Meghan.meinert@nikon.com
Web: www.nikonmetrology.com


