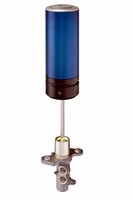
Inspection System provides 360° view of bore surfaces.
Press Release Summary:

Consisting of optical sensor, computer, and slide to position sensor, IPS-10 internal inspection system installs within production line to inspect bores with diameter of 14-50 mm and depths to 450 mm. Images are scanned continuously by CMOS ring sensor array and system automatically detects surface flaws such as cavities, scratches, porosity, valleys, edge flaws, and unmachined surfaces. Included software sorts out defective parts and displays results as flaw statistics.
Original Press Release:
First of Its Kind - 360-Degree Optical Sensor Inspects Bore Surfaces
Hommel-Etamic, Rochester Hills, MI, has introduced a solution for automated in-line part inspection of bores, such as those found in connecting rods, brake master cylinders, injection system components, and hydraulic valves that cannot tolerate surface finish defects.
Consisting of an optical sensor, computer, and a slide to position the sensor, the IPS-10 internal inspection system is the first device of its kind worldwide. It is designed to be installed within a production line to inspect bores with a diameter of 14 mm to 50 mm and depths to 450 mm. Typical cycle times are only seconds per part to produce a complete optical inspection of a bore's inside surface.
"The visual, optical inspection of surfaces in bores is difficult and personnel-intensive, especially in short cycle times," said a spokesman. "The advantage of the IPS-10 is the combination of a short inspection time with a high resolution inspection of bore surfaces."
Hommel-Etamic GmbH has been involved in the automatic inspection of the surfaces of engine components, such as cam shafts, for many years.
Parts to be inspected must have a clean, dry surface in order to use this optical inspection method, according to the company. The system detects surface flaws such as cavities, scratches, porosity, valleys, edge flaws and unmachined surfaces fully automatically. The completeness and position of transverse holes and grooves is also possible in the same step.
How it works.
A 360° panoramic view optical system inserted into the bore creates an image of the bore's inside surface. Circumferential lines in the bore are projected in circular lines in the image level. This image is scanned continuously by a fast CMOS ring sensor array. Simultaneous forward movement of the inspection sensor and circular scanning creates an undistorted image of the inside surface which shows a rolled-out representation. Identical illumination conditions at every point produce brilliant, rich-contrast images. The optimum illumination and scanning speed of the camera make this inspection system superior to other solutions.
Software
As in every vision system, the software is an important component. Different inspection areas can be distributed over the whole bore. Inspection parameters and classification criteria include the flaw size, the flaw type, distances between the flaws, agglomeration of flaws, and more.
The system is ideal for flexible production because adaptation to a new part type is easy. First, a flawless part surface is recorded. The surface of the bore appears on the screen. Next, the inspection areas are defined and any existing nominal structures such as bores and/or grooves are defined. Any flaws in these inspection areas are classified as such and the set-up process is completed. The system is now ready for automatic operation. The software sorts out the defective parts and the results, such as flaw type, flaw area, date, serial and part numbers are listed and displayed as flaw statistics. All the necessary settings are saved in the inspection parameter sets.
About Hommel-Etamic
Hommel-Etamic is one of the leading manufacturers and system providers for high precision, tactile and non-contact (production) metrology. Solutions for a wide range of different measuring tasks include roughness, waviness, contour, form, dimensional, post-process, and in-process measurements. Hommel-Etamic also provides consulting, training and service including long-term maintenance contracts.
Approximately 580 employees at more than 50 sales and service locations globally work with customers in finding production metrology solutions.


