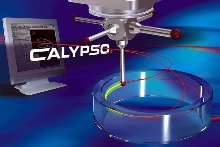
CAD-Based Programming Software is suited for CMMs.
Share:
Press Release Summary:

Utilizing Visual Metrology(TM) concept, CALYPSO® v4.0 has object-oriented foundation and offers self-centered scanning, optimized clearance planes, and ability to view CMM navigation points on CAD screen. It also lets users control evaluation range for circle paths and lines as well as CAD origin. Simulation has graphic representation of probe head and machine volume and support for rotary table. Users can also bring new CAD models into measurement plans.
Original Press Release:
Carl Zeiss Releases Calypso® 4.0 Version Of CAD-Based Programming Software
MAPLE GROVE, October 18 - Carl Zeiss Industrial Measuring Technology (IMT) today introduced the latest version of CALYPSO® 4.0. The powerful CAD-based programming software for coordinate measuring machines (CMMs) offers several new key functions, options and features that reduce programming time and provide additional capabilities.
With the introduction of CALYPSO 4.0, Carl Zeiss continues to advance the successful Visual Metrology(TM) concept - the object-oriented foundation of CALYPSO and the success story of the industry leading software.
Not only users of Zeiss CMMs, but also those who use CALYPSO 4.0 with non-Zeiss CMMs will benefit from the new features. CALYPSO 4.0 offers even better performance when used with ZEISS scanning technology.
New functions in CALYPSO 4.0 include:
Measuring
· Self-centered scanning - ability to self-center scan a spline, and creating a cylinder for use as a datum
· Optimized clearance planes - ability to control clearance planes relative to the base alignment, machine system or secondary alignments
· Navigation Check - allows operator to view the CMM end positions, outer clearance planes, magazine with stylus systems, and rotary table on CAD screen
Evaluation
· Control of the evaluation range for circle paths and lines
· User control of CAD origin (Car body applications etc.)
Planner and Simulation
· Simulation now has a graphic representation of the probe head and machine volume and support for the rotary table
· Improved collision detection and simulation speed control
CALYPSO Curve
· Improved import of lift curve data
· Plots for curve slope
· Curve expansion, distance and stroke
CAD Model Comparison
· Ability to bring a new CAD model into a measurement plan. The probing points of all features are checked for compliance with the new design of the CAD model and accepted if they correlate. Any non-correlating features are displayed in a list for further investigation.
· Load and Run a measurement plan without loading the CAD model.
The Carl Zeiss Group offers products and services for the three strategic growth areas of biosciences and health care, consumer goods and systems solutions for industrial markets. The group is structured as six business units that operate with sole responsibility and are generally ranked first or second in their markets. The company is represented in more than 30 countries and operates production facilities in Europe, North America, Mexico and Asia. In fiscal year 2002/2003 the global workforce of approximately 14,150 employees generated revenue of 2.029 billion euros. Further information is available at www.zeiss.com.


