REVO® Retrofit Nets Higher Data Collection Rates

Scanning probe retrofit supercharges CMM data collection rates, allows form analysis
Renishaw's REVO® system enables 4x reduction in impeller inspection times, additional data to be used to compare inspected surfaces with 3D CAD models.
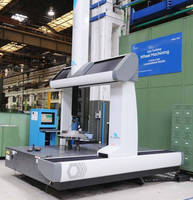
GE Oil and Gas Florence, Italy, has transformed the performance of a DEA Global coordinate measuring machine (CMM) with a REVO retrofit scanning probe system from Renishaw, producing higher data collection rates to allow form analysis - a function previously not practical due to the lengthy inspection times required. The retrofit, performed by Renishaw engineers, replaced the previous head, touch trigger probe, DEA controller and PC-DMIS® software with the Renishaw Renscan5(TM) system, including REVO 5-axis scanning head, UCC2 controller and MODUS(TM) software.
The retrofit system's ability to reduce typical inspection times will facilitate collection of the additional data necessary for form analysis. "Our inspection time on a standard impeller reduced by 4 times with the retrofit," said Claudio Bartali, Manufacturing Technology Project Leader for GE Oil and Gas. "However, the exciting part will be using the massive amount of measurement data to compare the form of inspected surfaces with the 3D CAD models."
With a requirement for 100 percent inspection, there is a high demand on the CMMs and programming systems at the GE plant. The DEA Global is used to perform dimensional inspections on components varying in size and geometry up to 1000 mm diameter.
REVO is a contact scanning probe with two integral measuring axes that can work in a true 5-axis measuring mode when using the three axes of the CMM, allowing a completely different method of checking the impeller dimensions. The top face, for example, is measured with what Renishaw calls a "gasket scan," a rapid sweep of the top machined face in about two seconds, gathering thousands of points. The previous method involved four touch trigger points and took close to 30 seconds. A best-fit calculation of the scanned data allows the software to plot a plane through all the points, confirming the position of the face and its relation to other surfaces. This large amount of data will be used to calculate if the surface is deformed in any way, and exactly which parts of the face deviate from the ideal CAD model of the component.
GE tested the accuracy of the new system by direct comparison of the touch trigger method and REVO. "The accuracy of measured points was at least as good, but at considerably higher speeds and while gathering so many more points," said Paolo Trallori, Calibration and Metrology Leader for the plant. "The lightweight REVO head is extremely fast when measuring, with the speed of the machine's axes movement no longer the limiting factor - the machine is often acting just as a carrier for the REVO," said Trallori. "In most circumstances this means inspection moves can be 50 or 100 times faster than before. Some moves, like scanning the outside diameter of the impeller, are limited by the machine speed, but in this case REVO still reduces overall inspection time."
By maintaining constant contact with the surface in one smooth rapid move, rather than moving on and off to take single points, inspection times are reduced and thousands of data points are gathered with the REVO system. "We will be able to certify the quality of components in terms of form tolerances, as well as simple dimensional tolerances," said Trallori.
The Renscan5 system has been integrated fully into GE Oil and Gas' production systems, with the Renishaw MODUS software executing inspection moves generated by a Unigraphics CAD/CAM system. The compatibility of MODUS with DMIS is very important, as the 3D CAD model generated in the original design of the component is used for everything from machining the component to verifying its quality. Each component is tracked throughout the process by its serial number, with a full record of every stage of production. The new system allows GE Oil and Gas to add extra quality data to the record and further improve machining operations.
A second machine, a DEA Scirocco with less volume for smaller impellers, is currently being retrofitted with a REVO system. Another larger gantry machine, for very large impeller parts, is also being considered for retrofit. "REVO has brought us a far better and more comprehensive method of inspection in a shorter time," said Bartali. "Now we will be implementing quality standards for form measurement, something we could never do before."
For more information on CMM retrofits, contact Denis Zayia, CMM products manager, at 847-286-9953, or email denis.zayia@renishaw.com.
About GE Oil and Gas
Florence is GE Oil and Gas' business headquarters, with a global installed base of machinery and equipment of more than 20,000 units. Projects include the world's largest LNG compression trains, re-injection of high sulfur gas, enhancing the safety and productivity of the world's oil and gas pipelines, and equipment for the production of oil and gas from deep subsea resources.
Contact
Jeff Seliga
Renishaw Inc.
Hoffman Estates, IL 60192
Tel: 847.286.9953
Fax: 847.286.9974
jeffrey.seliga@renishaw.com
or
Jeff Drum
Kemble & Rude Communications, Inc.
Cincinnati, OH 45226
Tel: 513.871.4042
Fax: 513.871.4895
jdrum@kemblerude.com
Inquiries should be directed to:
In USA: Susan Wilm, Marketing Assistant, Renishaw Inc., 5277 Trillium Blvd., Hoffman Estates, IL 60192 Susan.wilm@renishaw.com Tel: 847.286.9953.
In Canada: Dafydd Williams, General Manager, Renishaw (Canada) Limited, 2180 Dunwin Drive, Unit #1, Mississauga ONT L5L 5M8 dafydd.williams@renishaw.com Tel: 905.828.0104.


