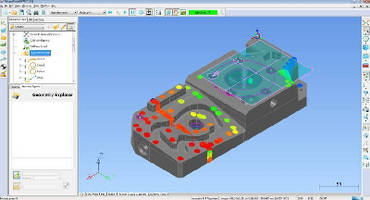
Inspection Software can create compound items.
Share:
Press Release Summary:

In addition to taking all types of measurements, PowerINSPECT 2014 can inspect variety of geometric features and analyze complex 3D surfaces. Users can create custom toolbars, which allow frequently used commands to be grouped in one place. By creating compound items, PowerINSPECT can accelerate and simplify repetitive measurements. Users can choose to display nominal, deviation, and error values, helping to highlight immediately whether each measured feature is in tolerance.
Original Press Release:
Delcam to Launch New-look PowerINSPECT Inspection Software at Control
Delcam will launch the 2014 release of its PowerINSPECT inspection software at the Control exhibition to be held in Stuttgart from 6th to 9th May. PowerINSPECT 2014 will feature a new interface with new icons that will make the software more intuitive and even easier to use. Other enhancements in the new version include the ability to create compound items and so speed up and simplify repetitive measurements.
The new interface has been developed to further improve the ease of use that has been central to PowerINSPECT becoming the world’s leading hardware-independent inspection software. Over the last few releases, the software has seen a significant increase in the range of measurements that it can make. The software can now be used to take all types of simple measurements and to inspect a growing variety of geometric features, as well as offering more tools for analysing complex 3D surfaces. In addition to making it easier to negotiate the greater range of options, the interface features freshly-designed icons, which give a cleaner look and feel to the software.
PowerINSPECT 2014 also has the ability for users to create custom toolbars, which allow frequently-used commands to be grouped together in one convenient place. This will also improve speed and ease of use. It is possible to export and import toolbars, so users can easily transfer their set-up to a different PC or share their toolbars with other operators.
During inspection, 2D features (circles, slots, rectangles and the like) are always projected to a reference plane. For example, when inspecting a circle representing the top of a cylinder, the user will want to measure the properties of the circle and its height. PowerINSPECT can now create a compound item that combines the plane and the feature together into a single compound feature, and assumes that the 2D feature is to be reported, while the plane is not. This leads to a shorter sequence tree that is easier to navigate, and a report that shows only the properties of the 2D features by default.
This option is especially valuable for any iterative building operation, where an assembly needs to be measured, adjusted and re-measured until the results are acceptable. Using compound features makes it much quicker and easier to go back and forth between measurements. In particular, if the plane needs to be re-measured to determine the height of the circle, rather than the xy position, it can be re-measured immediately. This option was primarily designed for the building and calibration of fixtures but it is useful in any scenario where the user has to re-measure and adjust features within an assembly.
Enhancements to the measurement dialogues allow a wider range of information to be shown in addition to the measured values. The user can now also choose to display nominal, deviation and error values, helping to highlight immediately whether each measured feature is in tolerance. This provides the operator with more complete information, allowing even faster decisions about the status of the part and whether to continue with, or end, the measurement routine.
The range of geometric features that can be measured with PowerINSPECT continues to be increased with a new option to create a probed ellipse. A new constructed geometric feature allows the user to create the circle at the intersection of two tori. This can then be used to locate the transition point in ‘S’ bends in tubing and ductwork applications. In addition, enhancements have been made to the measurement of a constructed ellipse.
Improved calibration records can now be recorded in the probe database. This allows better traceability of the data and provides more assistance for the user to manage their calibrations.
Finally, PowerINSPECT 2014 includes improved support for the Renishaw PH20 probe. This probe is becoming more popular as the five-access motion of the PH20 allows measurement points to be taken by moving only the head rather than the complete CMM structure, giving easy access to features at any angle and minimising stylus changes.
For further information on Delcam’s PowerINSPECT software, please contact:-
Peter Dickin
Marketing Manager
Direct phone: 44 (0)121 683 1081
e-mail: marketing@delcam.com
Delcam plc    Â
Small Heath Business Park,  Â
Birmingham, B10 0HJ, UK
www.delcam.com


